Collabion Charts for SharePoint allows you to add a heading and sub-heading to the specified chart. The heading and sub-heading provide a basic overview of information present in the chart. You can also set titles for the X-Axis and Y-Axis.
Learn how to:
- Set Chart Title and Sub Title
- Customize the Chart Title and Sub Title
- Set Axes Titles
- Customize the Axes Titles
- Dynamic titles
- Rotate Y-Axis title
- Fit Y-Axis title
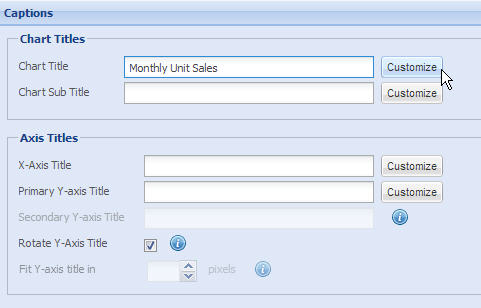
To specify the chart title and sub title follow the steps given below:
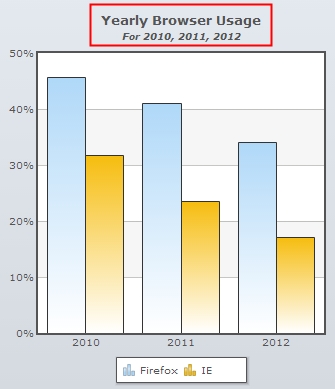
- To display the main heading for the chart enter the desired title in the Chart Title text box. The chart title appears at the top of the chart.

- To display the sub heading enter the desired sub title for the chart in the Chart Sub Title text box. The chart sub title appears below the chart title.

- Click Preview to view the changes made.
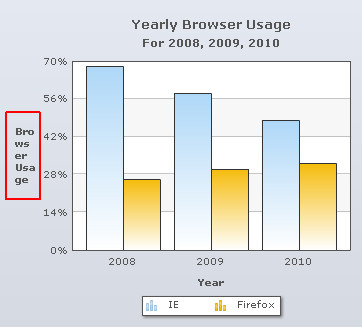
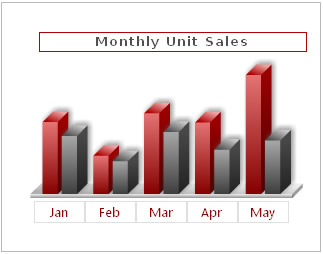
A chart with title and sub title will look as under:
Note:
Click Apply to apply the changes.
Click Revert to undo the changes made.
Customize the Chart Title and Sub Title
You can add styles and effects to the chart title and sub title. Click the Customize button beside the respective text boxes. The Customize Styles dialog box window that will open, allows you to define styles. Click here to learn how to use it.
You can add titles for both the axes (X-Axis and Y-Axis).
Note: In Combination dual Y-axis charts there are two Y-Axes: Primary and Secondary.
To specify the axes titles follow the steps given below:
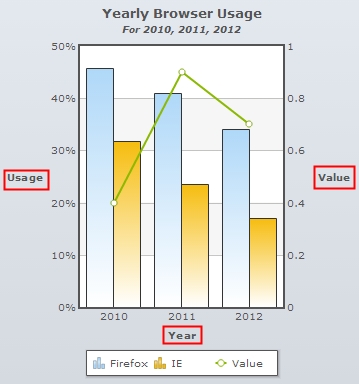
- To specify the X-Axis title, enter the intended name in the X-Axis Title text box. The X-Axis title is displayed below the X-Axis labels.

- To specify the primary Y-Axis title, enter the intended name in the Primary Y-axis Title text box. By default, the primary Y-Axis title appears on the left side of the chart.

- To specify the secondary Y-Axis title, enter the appropriate name in the Secondary Y-axis Title text box. Secondary Y-Axis is applicable in dual Y-Axis charts only. By default, the secondary Y-Axis title appears on the right side of the chart.

- Click Preview to view the changes made.
A chart with the axes titles looks as under:
Note:
Click Apply to apply the changes.
Click Revert to undo the changes made.
You can add styles and effects to the axes titles. Click the Customize button beside the respective text boxes. The Customize Styles dialog box window that will open, allows you to define styles. Click here to learn how to use it.
You can also configure dynamic text for Chart Title, Sub Title, X Axis Title and Y Axis Title through the following macros:
{wizardFilter}: the caption will be set to display any static filter setting applied to the chart from inside the Collabion Charts wizard.
{userFilter}: the caption will be set to display any of the user applied filters i.e. Dynamic Filter or SharePoint WebPart filter. If both of the filters are applied, then it would display the resultant filter.
{clickedLabel}: this macro returns X axis label of the dataplot clicked to drill down.
{clickedValue}: this macro returns the series value of the dataplot clicked to drill down.
{currentSeries}: this macro is useful for multi-series charts, where it displays the name of the series which contains the dataplot clicked to drill down.
{currentLabelField}: this macro returns the X Axis label column of the chart at the current drill down level.
Example: If you have a chart summarized along the X axis for the 6 Continents and then drilling down to countries, you can apply the following macro combination:
{clickedLabel} = {clickedValue}
Now if you click say Asia, the above setting would return the following caption in the next drill down level:
Continent = Asia
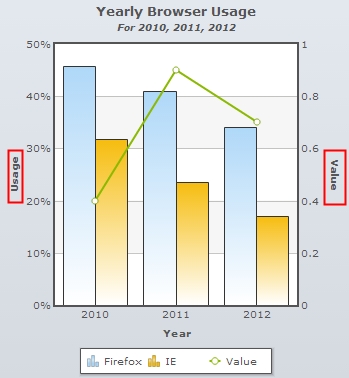
The Y-Axis title, by default, appears horizontally. If you want to rotate the Y-Axis title vertically, you need to select the Rotate Y-Axis Title check box. Click Preview to view the change made.
A vertically rotated Y-Axis title consumes less space on the left margin of the chart.

A chart with rotated Y-Axis title looks as under:
Collabion Charts for SharePoint allows you to set the Y-axis title width in pixels. In case the width of the title is greater than the width set, then the text will appear as wrapped. Let us configure the Fit Y-axis title as shown below:
![]()
Note: You need to clear the Rotate Y-Axis Title checkbox to activate this feature.
A chart with customized Fit Y-Axis title looks as under:
Note:
Click Apply to apply the change.
Click Revert to undo the change made.
Customize Chart Title, Sub-Title and Axes Titles
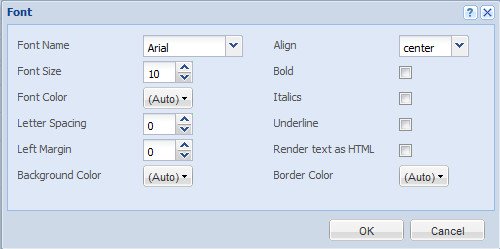
Using the Font style type the visual properties of all the text present on the chart can be configured.
Given below is a table with all the customizable properties for the font:
| Properties | Description |
| Font Name | Sets the font family for the text. For example, Verdana |
| Font Size | Specifies the font size. For example, 10 |
| Font Color | Sets the font color. For example Red. |
| Letter Spacing | Sets the amount of space that is uniformly distributed between characters of the text. |
| Left Margin | Sets the left margin of the text, in points. |
| Background Color | Sets the background color for a text box. For example, Red. |
| Align | Sets the alignment of the chart caption or sub-caption. This attribute is only applicable to chart captions and sub captions. The default value is center. For example, left, right and center. |
| Bold | Indicates whether font should be bold or not. |
| Italics | Indicates whether font should be italicized or not. |
| Underline | Indicating whether font should be underlined. |
| Render text as HTML | Helps you set whether the text should be rendered as HTML or plain text. |
| Border Color | Sets the color of the border around the text. For example, Yellow. |
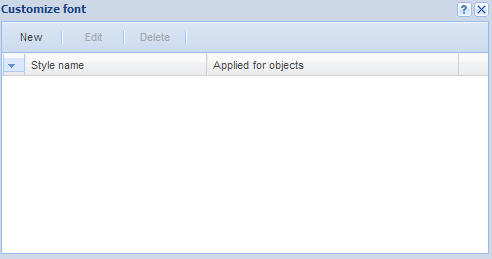
To create a new Font style follow the below given steps:
- Click Customize button to define font style.
- Click New to create a Font style.
- Make the necessary changes to the settings and click OK. A dialog box appears with the new font style added under the Style name heading. Click OK.
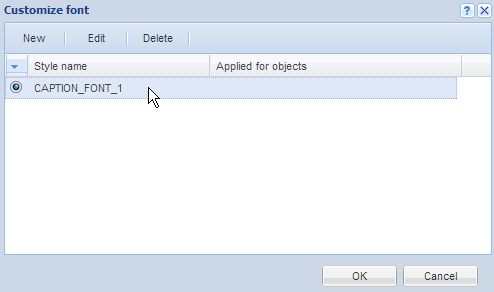
Customize font window opens.
![]()
The font dialog box appears with the configurable settings. To know more on the settings click here.
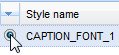
You can also edit an existing font style to change the appearance of the font. Given below are the steps on how to edit an existing font style:
- Click Customize button.
- Make sure that the radio button is selected beside the font style which you want to edit.
- Click Edit.
- Make the necessary changes and click OK.
A dialog box appears with the existing font style under the Style name heading.
![]()
The Font dialog box appears with the existing settings.
To know more on the available settings see click here.
You can also delete an existing font style. To delete an existing font style follow the given below steps:
- Click Customize button.
- Make sure that the radio button is selected beside the font style which you want to edit.
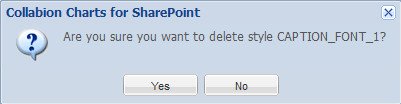
- Click Delete.
A dialog box appears with the existing font style under the Style name heading.
![]()
A dialog box appears to confirm that whether you want to delete the font style. Click Yes.