Collabion Charts for SharePoint allows you to add animated charting sequences that will make you chart more delightful and attractive. You can create custom animations and use them to various chart objects such as, caption, sub-caption, y-axis title, x-axis title, etc.
To create and apply animation style you need to:
- Click Customize or Customize fonts, animation and effects.
- Click New to create an animation style.
- Make the necessary settings and click OK. A dialog box appears with the new animation style added under the Style name heading. Click OK.
![]() Or
Or ![]()
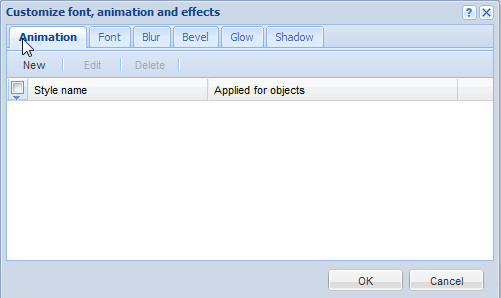
A dialog box appears. By default, Animation tab is selected.
![]()
The Animation dialog box appears with the following configurable settings:
Note: To know more on how to configure the settings click on the above mentioned names.
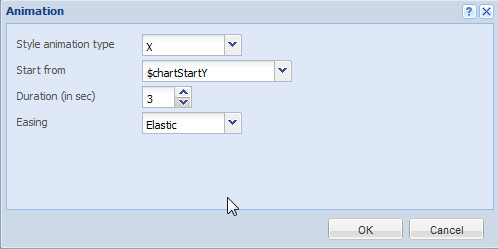
Each and every chart object supports animation properties which can be set through Style Animation Type. Given below is a table of the properties of chart objects that can be animated using Style Animation Type:
| Property | Description |
| X | Helps animate the x position of a chart object |
| Y | Helps animate the y position of a chart object |
| X Scale | Helps animate the x-scale (horizontal scale)of a chart object |
| Y Scale | Helps animate the y-scale (vertical scale) of a chart object |
| Alpha | Helps transparency fading animation effect. When Alpha is selected you need to manually set the Start from field. For example, if you are animating the dataplot for fade in alpha effect, the start value of alpha will be 0. |
| Rotation | Helps to animate the pies and doughnuts in circular motion |
Collabion Charts for SharePoint provides you with some pre-defined variable which assume values at run-time. For example, $canvasStartY depicts the start y position of the canvas and the values is calculated at run-time only. Below given is a table with all the possible variables for this field:
| Variables | Description |
| $chartStartX | Chart Start X Position. It is 0 if you are loading the chart in an HTML page. However, if you are loading the chart in another Flash movie, it will take the given X Position. |
| $chartStartY | Chart Start Y Position. It is 0 if you are loading the chart in an HTML page. However, if you are loading the chart in another Flash movie, it will take the given Y Position. |
| $chartWidth | Width of the chart. |
| $chartHeight | Height of the chart. |
| $chartEndX | End X Position of the chart. Same as width of chart if you are loading the chart in an HTML page. |
| $chartEndY | End Y Position of the chart. Same as height of chart if you are loading the chart in an HTML page. |
| $chartCenterX | Center X Position of the chart. |
| $chartCenterY | Center Y Position of the chart. |
| $canvasStartX | Canvas Start X Position (from left), that is, x co-ordinate of left side of the canvas. |
| $canvasStartY | Canvas Start Y Position (from top), that is, y co-ordinate of the top of canvas. |
| $canvasWidth | Width of canvas. |
| $canvasHeight | Height of canvas. |
| $canvasEndX | End X Position of Canvas, that is, x co-ordinate of right side of canvas. |
| $canvasEndY | End Y Position of Canvas, that is, y co-ordinate of bottom of canvas. |
| $canvasCenterX | Center X Position of canvas. |
| $canvasCenterY | Center Y Position of canvas. |
Note: When Alpha is selected in the Style animation type field the above properties does not appear for the Start from field. You need to manually set the value. For example, if you are animating the dataplot for fade in alpha effect, the start value of alpha will be 0. Enter this value in the Start from text box.
You can also set the duration for which you want the animation effect to appear. Enter the value in the Duration (in sec) spin box or you can also click on the up down arrow to set the value. The value is calculated in seconds. For example, if you enter 5, the animation will take place for 5 seconds.
![]()
Easing refers to the gradual movement (acceleration or deceleration) of the animation effect. Given below is the list of easing methods:
| Methods | Description |
| Elastic | Adds an elastic effect that falls outside the transition range at one or both ends. The amount of elasticity is unaffected by the duration. |
| Bounce | Adds a bouncing effect within the transition range at one or both ends. The number of bounces relates to the duration—longer durations produce more bounces. |
| Strong | Adds slower movement at one or both ends. This effect is similar to Regular easing, but it is more pronounced. |
| Regular | Adds slower movement at one or both ends. This feature enables you to add a speeding-up effect, a slowing-down effect, or both. |
| None | Adds an equal movement from start to end without effects, slowing, or speeding up. This transition is also referred to as a linear transition. |
Edit an existing animation style
You can also edit an existing animation style to change the settings of the animation. Given below are the steps on how to edit an existing animation:
- Click Customize or Customize fonts, animation and effects.
- Make sure that the check box is selected beside the animation style which you want to edit.
- Click Edit. A new dialog box appears with the existing settings.
- Make the necessary changes and click OK.
![]() Or
Or ![]()
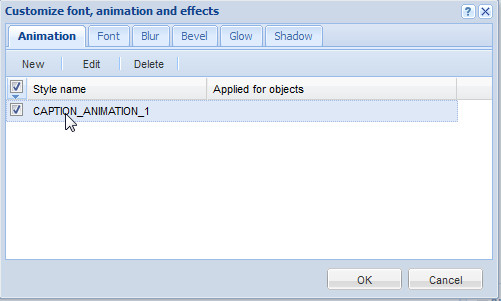
A dialog box appears with the existing animation style under the Style name heading.
![]()
![]()
The Animation dialog box appears.
To know more on the available settings see:
Delete an existing animation style
You can also delete an existing animation style. To delete an existing animation style follow the given below steps:
- Click Customize or Customize fonts, animation and effects.
- Make sure that the check box is selected beside the animation style which you want to edit.
- Click Delete.
![]() Or
Or ![]()
A dialog box appears with the existing animation style under the Style name heading.
![]()
![]()
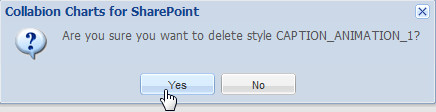
A dialog box appears to confirm that whether you want to delete the animation style. Click Yes.